So, you have decided that time has come to become an Excel Master. Congratulations!
Before you start with Excel functions and tools, there are some basics that need to be covered first.
Let’s start our magical journey in Excel together!
So, you have decided that time has come to become an Excel Master. Congratulations!
Before you start with Excel functions and tools, there are some basics that need to be covered first.
Let’s start our magical journey in Excel together!
A really quick intro to Excel
Excel is the world’s most popular spreadsheet software, developed by Microsoft.
Excel debuted on September 30, 1985, and since that day, kept evolving to meet the requirements of the spreadsheet community.
And the best thing? Excel Online is absolutely free.
This website utilizes the technology of Excel Online to help you learn and practice Excel without the need have Excel installed on your computer. Thanks Microsoft!
So, let’s finish with the talking and start practicing!
Typing in Excel
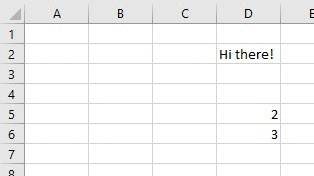
Excel can be used for complex calculations, but you can always use it to type regular text, just like you’d do in Word or any other software.
All you have to do is select one of the cells and start typing…
You can start by typing your name, your favorite pet, your favorite movie and your lucky number
When you finish typing, hit the Enter key to exit the cell edit mode.
As you can see, you can type both text and numbers in Excel.
Did you notice that certain parts of the sheets changed after you typed your details? This was done using Excel formulas, which we will cover in the next tutorials
How does Excel work?
Let’s discuss some of the basic ideas in Excel:
- Excel Cell
- Excel Range
- Excel Worksheet
- Excel Workbook
Let’s discuss some of the basic ideas in Excel:
- Excel Cell
- Excel Range
- Excel Worksheet
- Excel Workbook
1. Excel Cell
The Excel Cell is the smallest unit in Excel. The cell is used to store data.
In the previous example, we typed our names and favorite pets, movies and numbers in different Excel Cells.
Excel is comprised of rows and columns. The rows are represented as numbers, and the columns – as letters.
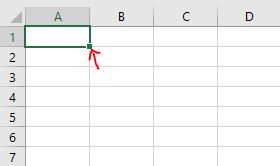
In order to reference a specific cell in Excel, we will type its column letter, followed by the row number.
So, A1 will be the first cell in your worksheet – It’s in the first column (A), and in the first row (1):
Ok, now let’s practice… Type your First Name in cell C3, and your Last Name in cell C4
The Excel Cell is the smallest unit in Excel. The cell is used to store data.
In the previous example, we typed our names and favorite pets, movies and numbers in different Excel Cells.
Excel is comprised of rows and columns. The rows are represented as numbers, and the columns – as letters.
In order to reference a specific cell in Excel, we will type its column letter, followed by the row number.
So, A1 will be the first cell in your worksheet – It’s in the first column (A), and in the first row (1):
Ok, now let’s practice… Type your First Name in cell C3, and your Last Name in cell C4
2. Excel Range
The Excel Range is comprised of two or more adjacent cells. These cells can be in the same row, the same column, or even in multiple rows and columns!
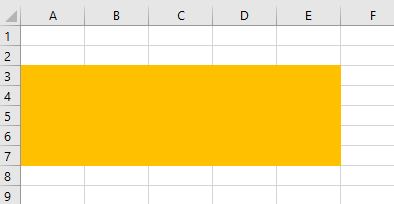
Each range is represented by two cells – The top-left cell, and the bottom-right cell, separated with colons.
For example, Range A3:E7 consists of the following cells:
The Excel Range is comprised of two or more adjacent cells. These cells can be in the same row, the same column, or even in multiple rows and columns!
Each range is represented by two cells – The top-left cell, and the bottom-right cell, separated with colons.
For example, Range A3:E7 consists of the following cells:
3. Excel Worksheet
The Excel Worksheet is comprised of rows and columns.
The default Excel Worksheet contains 1,048,576 rows and 16,384 columns.
In the following example, we have 4 different worksheets:
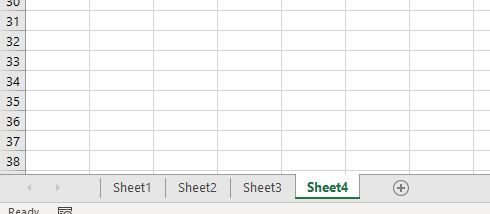
Tip – We can quickly navigate between worksheets using the shortcut Ctrl+Page Up/Ctrl+Page Down.
The Excel Worksheet is comprised of rows and columns.
The default Excel Worksheet contains 1,048,576 rows and 16,384 columns.
In the following example, we have 4 different worksheets:
Tip – We can quickly navigate between worksheets using the shortcut Ctrl+Page Up/Ctrl+Page Down.
4. Excel Workbook
The Excel file is also called Excel Workbook. It contains one or more worksheets.
The default Excel file type has an XLSX suffix.
Excel allows the user to use data from one worksheet in another worksheet in the same workbook. It also allows connecting between different workbooks.
The Excel file is also called Excel Workbook. It contains one or more worksheets.
The default Excel file type has an XLSX suffix.
Excel allows the user to use data from one worksheet in another worksheet in the same workbook. It also allows connecting between different workbooks.
Basic Calculations with Excel
OK, let’s start with the fun part!
We can perform calculations in Excel easily.
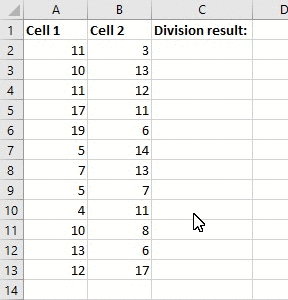
In order to start a calculation in a cell, we will type the = sign (equals), and then type our calculation.
These are the basic operators which can be used:
+ Add
– Substract
/ Divide
* (Asterisk) Multiply
^ Power
So, let’s say we want to find the result of 2+2:
OK, let’s start with the fun part!
We can perform calculations in Excel easily.
In order to start a calculation in a cell, we will type the = sign (equals), and then type our calculation.
These are the basic operators which can be used:
+ Add
– Substract
/ Divide
* (Asterisk) Multiply
^ Power
So, let’s say we want to find the result of 2+2:
Cell References
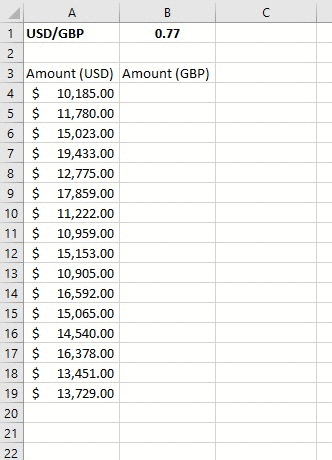
Okay, now that we know how to perform basic calculations, let’s learn how we can use cell references to make our calculations much quicker, and dynamic, as well!
If we type the = (equals) sign, followed by a reference to a cell (either by typing the cell name or clicking it), we can reference the data stored in that cell. We can also perform calculations using this way – Instead of manually typing the numbers, we can just reference the cells containing these numbers!
Let’s see how it works:
You can see in the example above that each time we change the data in the referenced cell – It is automatically reflected in the second cell!
Reusing cell references & using Partial and Absolute References
One of the advantages of using cell references in Excel is that we can reuse cell references in adjacent cells by copying the cell, or by dragging the cell to adjacent cells.
Let’s see how it works:
Sometimes, we would like that a certain reference will not move if we reuse the formula in other cells.
In such cases, we can use an Absolute Reference, by hitting the F4 button (or manually typing the $ signs before the column and/or row – not recommended) after typing the cell reference.
Let’s see this in action:
In certain cases, we might prefer using a Partial Reference rather than an Absolute Reference.
A Partial Reference allows us to keep the same reference only for a part of the cell – either the row or the column.
To use Partial Reference, just hit the F4 button until the deserved result is achieved.
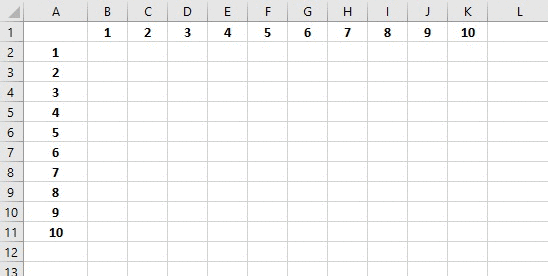
Let’s see how we can do the entire Multiplication Table calculation, using only one formula!
Now you are all set to continue your Excel journey and learn how to use Excel functions and tools. Good luck! 
One of the advantages of using cell references in Excel is that we can reuse cell references in adjacent cells by copying the cell, or by dragging the cell to adjacent cells.
Let’s see how it works:
Sometimes, we would like that a certain reference will not move if we reuse the formula in other cells.
In such cases, we can use an Absolute Reference, by hitting the F4 button (or manually typing the $ signs before the column and/or row – not recommended) after typing the cell reference.
Let’s see this in action:
In certain cases, we might prefer using a Partial Reference rather than an Absolute Reference.
A Partial Reference allows us to keep the same reference only for a part of the cell – either the row or the column.
To use Partial Reference, just hit the F4 button until the deserved result is achieved.
Let’s see how we can do the entire Multiplication Table calculation, using only one formula!
Now you are all set to continue your Excel journey and learn how to use Excel functions and tools. Good luck!

No comments: